


Tire Changing with Rabaconda Q&A
Take control of your tires. Save time. Ride more. Changing your own motorcycle tires isn’t rocket science — it’s skill, the right tools and a bit of confidence. Whether you ride dirt, street, pit bikes...

Tire changes don’t have to feel like a wrestling match. (We recently covered the basics in our Tire Changing FAQs.)
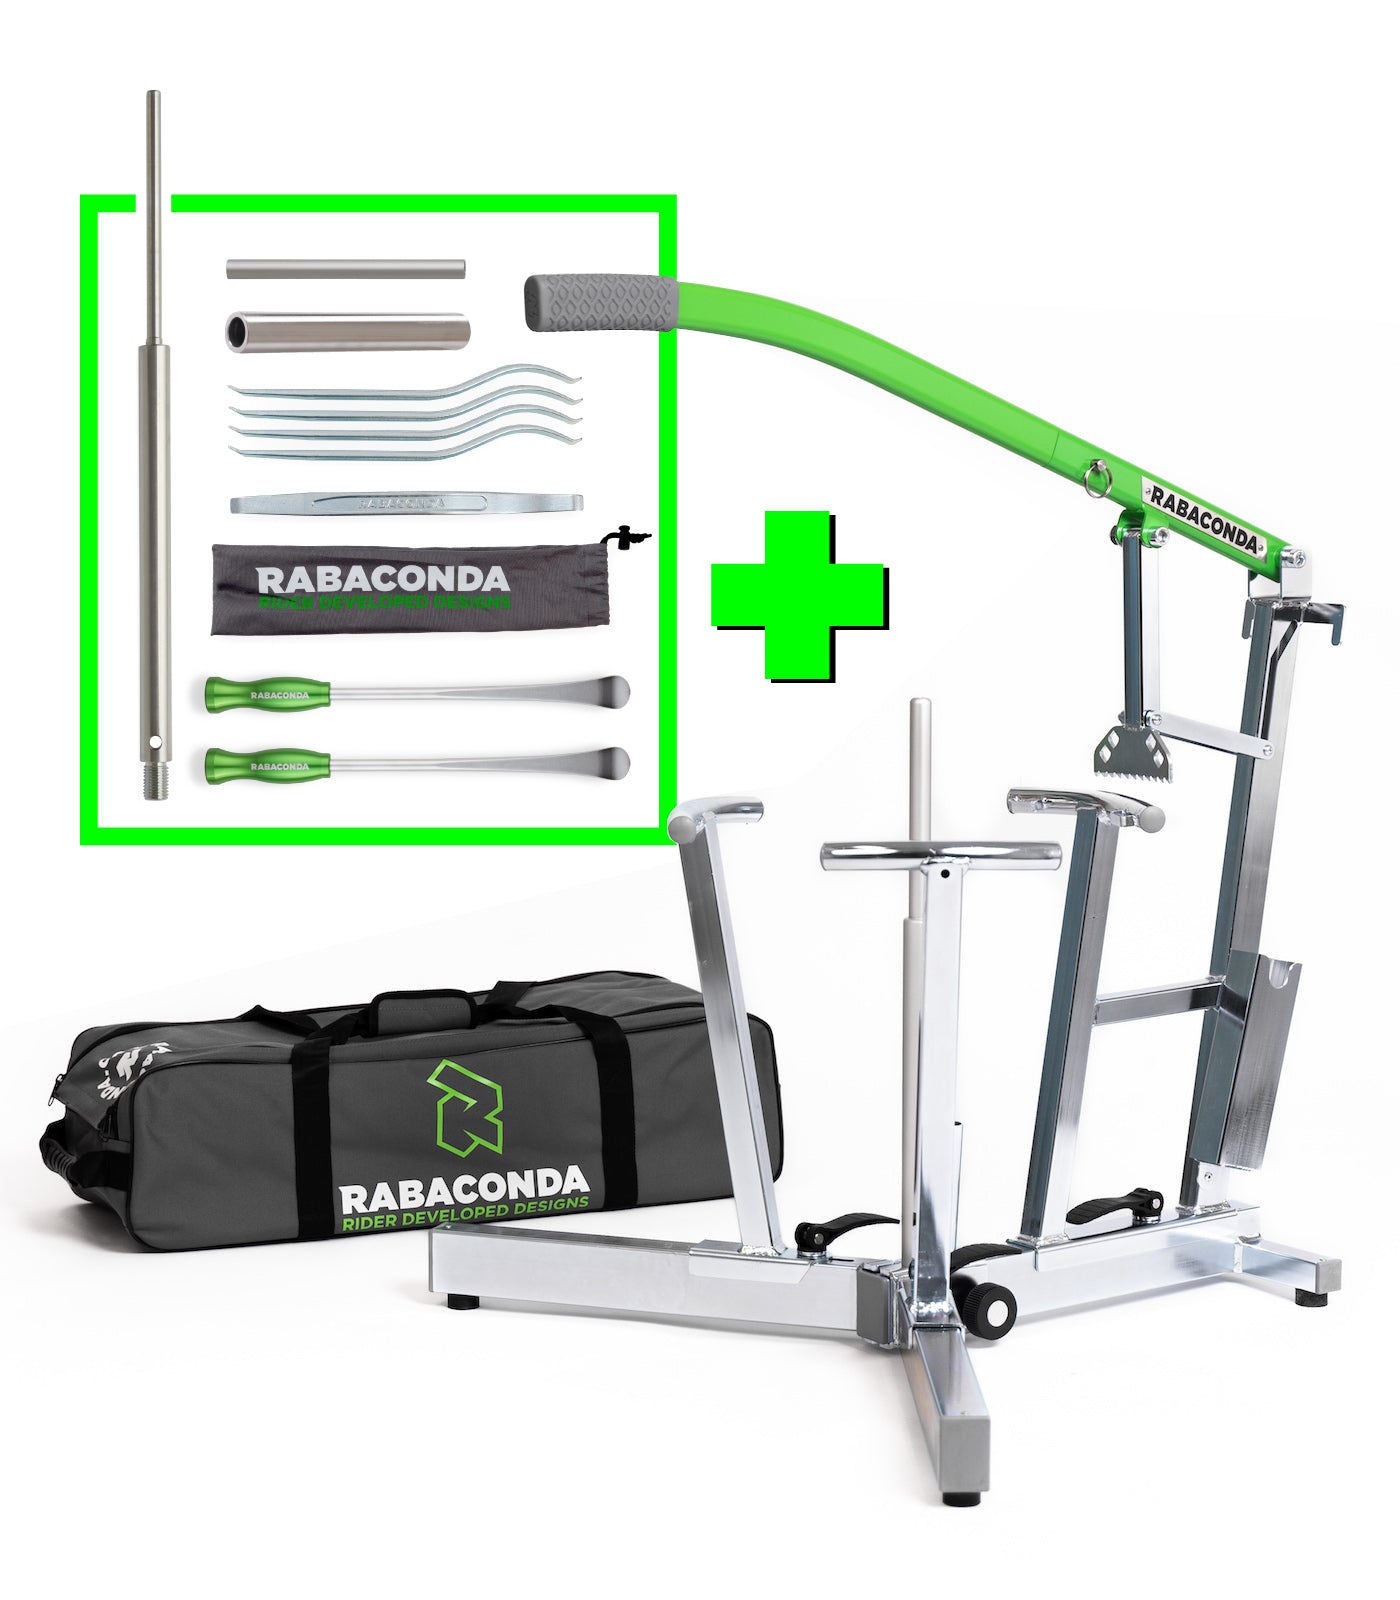
Most tire-changing mistakes happen when the wheel is sliding around, the bead won’t cooperate and you’re trying to do precision work with nothing holding the job in place. That's exactly where a solid tire changer setup, especially a portable one like the Street Bike Tire Changer, earns its keep.
If you want fewer pinched tubes, better bead control and a lot less wrestling, look for a setup that stabilizes the wheel, breaks the bead cleanly and helps keep the tire in the drop center while you work. (Learn more about the magic of Drop Center Tools: The Unsung Heroes of Tire Changing.)
Below are the 10 most common tire-changing mistakes for street riders running air-filled tires (tubeless and tube-type), plus quick fixes that can make the job faster, cleaner and way less frustrating.
Running mousse bib inserts instead of air? Skip to the Dirt Bike Tire Changer mousse tips near the bottom.

The mistake: Mounting a tire dry… or “lubing” it with WD-40 or whatever was closest to your bench.
Why it hurts: Dry rubber against a metal rim creates a high-friction contact point, which makes mounting the tire significantly harder. It also turns a normal tire change into a frustration generator, and that's when people start doing something "creative" with tire irons.
Do this instead:
Use a proper Bead Grease Tire Mounting Lubricant made for the job.
Apply a thin, even layer on both beads (not a gallon… you’re not glazing a donut).
Proper lube makes mounting the tire way easier, helping the bead slide where it needs to go and making sealing easier once it’s seated.

The mistake: Fighting the tire like it’s supposed to stretch over the rim evenly.
Why it hurts: If the bead isn’t pushed down into the rim’s drop center, you’re working against physics. Physics always wins.
Do this instead:
Keep the opposite side of the bead down in the drop center as you spoon.
Use Drop Center Tools (a pair is now included with the Street Bike Tire Changer) to keep it there.
If you remember one thing today: drop center = less swearing.

The mistake: Taking huge bites with long tire irons and yanking like you’re starting a lawn mower.
Why it hurts: Big bites bend rims, tear beads and pinch tubes.
Do this instead:
Use smooth, controlled movements.
Re-check that the bead across from you is still in the drop center.
Bonus tip: If you need hero strength, something earlier went wrong (usually drop center or lube).

The mistake: Half-broken bead, half-stuck bead… full frustration.
Why it hurts: A stubborn bead turns a 10-minute tire change into a garage hostage situation.
Do this instead:
Break the bead fully on both sides before trying to remove the tire.
Work evenly around the rim. If the bead is really glued on (hello, adventure tires), add soapy water and be patient.
Goal: Start the job with the bead already “defeated.”

The mistake: Sliding the iron in too deep, or levering directly against the tube.
Why it hurts: Pinch flats don’t announce themselves until you inflate, and then it’s instant sadness.
Do this instead:
Add a little air to the tube before mounting (just enough to give it shape).
Keep the tube pushed up into the tire as you work.
Tiny habit that helps: Always know where your tube is. If you’re not sure, stop and check.
The mistake: Mounting a tire backward and noticing only after the wheel is on the bike.
Why it hurts: Traction, braking and wear can all suffer. Also: you now get to do the job twice. Fun.
Do this instead:
Find the rotation arrow before you start.
Match it to your wheel’s rotation direction.
If it’s a rear wheel, double-check because… rear wheels love to trick people.
Pro tip: Snap a quick phone pic before removal if you’re second-guessing yourself.
The mistake: Trying to inflate/seat beads with the valve core installed, or leaving it out and losing it to the garage void.
Why it hurts: Seating beads often needs big airflow. The valve core restricts flow.
Do this instead:
Remove the valve core for bead seating.
Inflate to seat the beads (within tire/rim safe practices), then reinstall the core and set final pressure. (Read more on tire pressure myths.)
Bonus: Keep a set of three Valve Core Tools in your toolbox. They’re cheap insurance.

The mistake: Over-inflating to “force” the bead to seat.
Why it hurts: This can be unsafe and can damage the tire or rim.
Do this instead:
Use proper lube, confirm the bead is evenly positioned and inflate gradually.
Watch the bead line around the rim to ensure it’s seating evenly.
If it’s not seating, deflate, re-lube, reset and try again. Don’t just add more pressure.
Safety note: Always follow the tire and rim manufacturer guidance and use safe inflation practices.
The mistake: Careless tool placement or clamping the wheel in a way that stresses the brake rotor.
Why it hurts: Scratched rims are forever. Bent rotors are… also forever, but louder.
Do this instead:
Use rim protectors or a rim-friendly Street Bike Tire Changer if you care about your wheels (you do).
Keep levers off the rotor and sprocket.
For those extra sensitive carbon wheels, Carbon Fiber Wheel Supports will help keep your rims scratch-free.
Quick check: If the wheel is wobbling while you work, fix that first.
The mistake: Mount it, send it and assume your hands won’t go numb at 60 mph.
Why it hurts: Vibration, uneven wear, sketchy feel, especially at speed.
Do this instead:
Balance wheels intended for street/highway use.
Use the Motorcycle Wheel Balancer and stick-on Motorcycle Wheel Weights.
Recheck after your first ride if it feels off.
Off-road note: Dirt bikes can be more forgiving, but “more forgiving” isn’t the same as “always fine.”

If you’re installing mousse bibs, the vibe changes. No valve core. No bead seating with air. Yes, you’re dealing with rim locks. And “just muscle it” usually ends in torn knuckles and a bad attitude.
Here’s the mousse-friendly playbook, especially if you’re using a Dirt Bike Tire Changer, built to make fast mousse swaps realistic for real people, not just world championship off-road racers.
Prep first: Set up a workspace. Hose/wipe mud and grit off the tire, rim and mousse.
Mousse installs are all about sliding, not stretching.
Use mousse lube (not WD-40, not random shop chemicals). Manufacturers often recommend reapplying gel every time you install/remove a mousse.
Lube the inside of the tire, and add gel to the mousse as needed.
Keep gel off the tire beads so the tire doesn’t spin on the rim (even with a rim lock).
Cold mousse feels like a frozen loaf of bread.
Warm garage > cold garage.
Sun helps. A warm room helps. Your patience helps.
Even more than tubes, mousse rewards small, controlled progress.
1–2 inch spoon bites.
Keep the opposite bead down in the drop center.
If it feels impossible, you’re probably losing the drop center.

One Rabaconda-specific advantage: You can often remove the tire by pushing it down/off with the bead breaker once you get it started.
If the bead breaker slips, rotate the wheel and find the “sweet spot” where it grabs.
Got a rim lock? Position the bead breaker link to push past it.
With a mousse, you’re not blasting air to pop beads.
Work the tire around the rim and visually confirm the bead line is even.
Rotate and re-check before you call it done.
Save your calm, lube and technique for the last 10–15%, which is usually the tightest.
Keep the bead opposite you in the drop center the whole time.
If tire changing feels brutal, it’s usually not because you’re “bad at it.” It’s because one small step (drop center, lube, bead break, tube awareness) is quietly sabotaging the whole job.
Fix those, and tire changes get faster, safer and way less dramatic.
Happy tire changing!

