Changing your own motorcycle tire can sound like one of those garage jobs that starts with confidence and ends with busted knuckles, a few choice words and a tire lever launched into low Earth orbit. The good news is that it does not have to go that way.
If you work methodically, protect the rim and use the right tools, changing a motorcycle tire at home is absolutely doable for a DIY rider. This guide walks through the process in plain English so you can understand what to do, where people usually get stuck and how to make the whole job a lot smoother.
This article is written for riders who want a real solution first. We will cover the old-school way, the tool-assisted way and how a dedicated portable changer can make the job faster, cleaner and far less frustrating.
What you need before you start
At minimum, have the bike safely supported, the wheel removed, the replacement tire ready, soapy water and/or mounting lubricant on hand, valve core tools, tire irons, rim protection and a way to break the bead. If you plan to balance the wheel afterward, have a wheel balancer and wheel weights ready, too.
Warm rubber is your friend. A tire that has been sitting in the sun or brought into a warm room will usually fight you a lot less than a cold one. That one simple move can save time and effort before the job even starts. (We've even heard of a hairdryer or hot water doing the trick!)
Step 1: Remove the wheel and deflate the tire completely
Get the wheel off the bike, according to the service procedure for your model. Once it's off, remove the valve core and let the tire go fully flat. A lot of bead-breaking pain starts because there is still a little pressure hiding in the tire.
If the wheel uses a tube, pay extra attention to the valve stem area. If it is tubeless, inspect the bead seat and rim condition while you work.
Step 2: Break the bead
This is the part that sends plenty of riders down the frustration trail. The bead needs to separate from the rim before you can dismount the tire. Some riders use clamps, some use bodyweight and some use dedicated bead-breaking tools.
The safest and cleanest approach is to use a tool that gives you leverage and keeps the wheel stable. If you're doing this on the floor with improvised tools, slow down and watch your rim. This is where scratches and bad language tend to show up, often together.
Step 3: Dismount one side of the tire
Once the bead is free, lubricate the tire bead with soapy water and begin working one side over the rim. Tire irons can absolutely do the job, but the key is keeping the opposite side of the tire down in the drop center of the rim. That gives you the slack you need.
Use short, controlled bites rather than trying to move half the tire at once. Smaller moves are usually faster in real life because they keep the bead under control and reduce the chance of pinching a tube or scuffing a wheel.
Step 4: Remove the second side
After the first side is off, the rest of the job gets easier. Remove the tube if there is one, then work the second bead free. Inspect the rim strip, valve stem and wheel while everything is apart.
If you spot damage, now is the time to handle it. Nothing is more annoying than putting a fresh tire on and realizing a worn rim strip or damaged valve stem was waiting to ruin your afternoon.
Step 5: Mount the new tire
Confirm the tire direction before starting…it’s not fun to mess that part up and only realize it after you’ve mounted. Lubricate the bead, start the first side, then work the second side on while keeping the bead down in the drop center. The last section is usually the hardest, so stay patient and keep everything lined up.
This is another instance where the gap between a basic tool setup and a purpose-built tire changer becomes obvious. With a good setup, the wheel stays secure, your body position is better and you are not wrestling the tire while also trying not to scratch the rim.
Step 6: Inflate and seat the beads
Reinstall the valve core if needed, inflate the tire carefully and confirm both beads seat evenly around the rim. Watch the molded line near the bead and make sure it looks consistent all the way around.
If the bead is being stubborn, do not just keep blasting air without a plan. More lube, better alignment and a reset are usually smarter than brute force.
Step 7: Balance the wheel and reinstall it
Balancing is worth doing, especially on street bikes. It helps the bike feel smoother and can reduce vibration and uneven wear while often extending the lifespan of your tires. A compact balancer, like the Rabaconda Motorcycle Wheel Balancer, makes this step simple and repeatable at home.
Once balanced, reinstall the wheel, torque everything correctly and double-check brake function before riding.
Common mistakes that make the job harder
Working with a cold tire, skipping lubrication, forgetting to keep the bead in the drop center and rushing the last section of the mount are some of the biggest self-inflicted problems. Improvised rim contact points are another one. A scratched wheel is a lousy souvenir from changing your own tires.
The other big mistake is assuming more force is better. In tire changing, a better technique usually beats more force and really reduces the risk of damaged rims or broken tools.
Where Rabaconda fits in naturally
This guide is not here to pretend there is only one way to change a tire. Riders have been using buckets and basic irons for years. That said, if you change tires with any regularity, a dedicated changer can make the process dramatically easier.
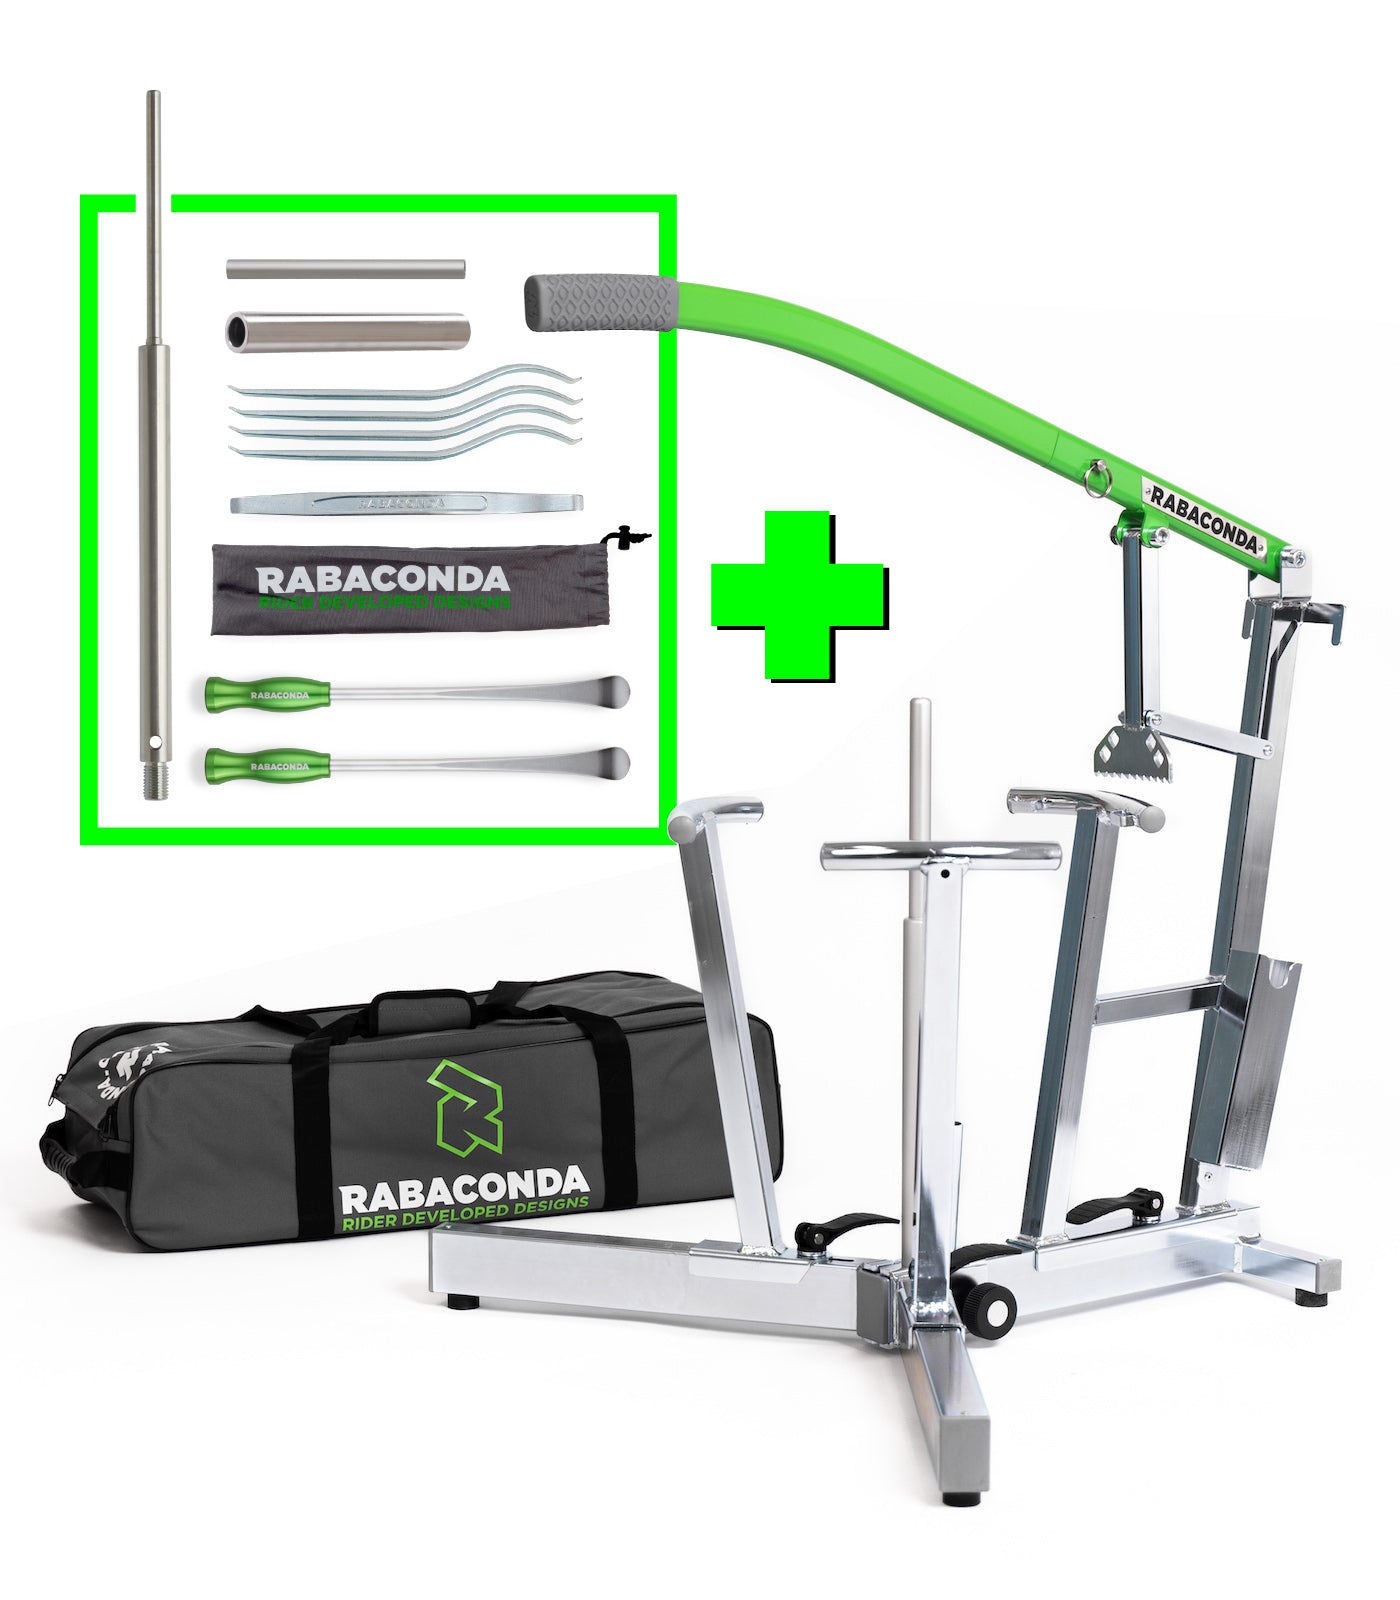
The Rabaconda Street Bike Tire Changer is built specifically to solve the messy parts of this job. It is portable, sets up in seconds, works on 12- to 21-inch wheels and tires up to 250mm wide and its plastic contact points help reduce the risk of rim damage. The unique wheel angle creates a handy operating position, while the long bead-breaking lever and wide stance help keep the process stable and controlled.
In plain terms, it gives you a cleaner workflow. Less floor crawling. Less drama. Less chance of turning a simple tire swap into a garage grudge match.
Who benefits most from a portable tire changer
If you ride enough to wear through multiple sets a year, swap between street and dirt-oriented rubber, travel to track days or just prefer doing your own work, this is the kind of tool that starts paying you back in saved time and saved shop visits.
One Rabaconda customer put it simply: The local shop was charging $85 and up for two tires, and the ability to change tires at home meant the changer would pay for itself soon. That is the kind of practical math a lot of riders understand pretty quickly.
Final takeaway
Yes, you can change a motorcycle tire at home. The process is very doable, but the experience depends heavily on your setup. With patience and basic tools, you can get the job done. With a purpose-built portable changer, the job usually gets faster, easier and a whole lot less aggravating.
If your goal is simply to understand the process, start with the steps above. If your goal is to do it regularly without the usual garage circus, it makes sense to look at a tool designed for exactly that job.
Frequently asked questions
Can I change a motorcycle tire at home without a machine?
Yes. Plenty of riders do it with tire irons and careful technique. A dedicated changer like the Rabaconda is not required, but it can make the job significantly easier, more convenient and safer for the wheel finish.
How hard is it to change a motorcycle tire yourself?
The hardest parts are usually breaking the bead and mounting the last portion of the tire. Warm rubber, proper lube and keeping the bead in the drop center make a big difference. (Read this blog on why our Drop Center Tools are the unsung hroes of tire changing.)
Do I need to balance a motorcycle tire after changing it?
For street use, balancing is strongly recommended. It helps reduce vibration and can improve ride quality and tire wear.
What is the easiest way to change a motorcycle tire at home?
The easiest approach is to use a stable setup with proper tire lube, rim protection and a dedicated changer that holds the wheel securely while you work.